Deleting Cells and Sections from Table Views
Problem
You want to delete sections and/or cells from table views using animations.
Solution
In order to delete sections from a table view, follow these steps:
-
First delete the section(s) in your data source, whether you are using a data model like Core Data or a dictionary/array.
-
Invoke the deleteSections:withRowAnimation: instance method of UITableView on your table view. The first parameter that you need to pass to this method is of type NSIndexSet and this object can be instantiated using the indexSetWithIndex: class method of NSIndexSet class, where the given index is an unsigned integer. Using this approach, you will be able to delete only one section at a time. If you intend to delete more than one section at a time, use the indexSetWithIndexesInRange: class method of NSIndexSet to create the index set using a range and pass that index set to the aforementioned instance method of UITableView.
If you want to delete cells from your table view, follow these steps:
- First, delete the cell(s) from your data source. Again, it doesn’t matter if you are using Core Data, a simple dictionary, array, or anything else. The important thing is to delete the objects that represent the table view cells from your data source.
Discussion
In your UI code, sometimes you might need to delete cells and/or sections. For instance, you might have a switch, and when the switch is turned on by the user, you might want to insert a few rows into your table view. After the switch is turned off by the user, you will then want to delete those rows. It’s not always table view cells (rows) that you have to delete. Sometimes you might need to delete a whole section or a few sections simultaneously from your table view. The key for deleting cells and sections from table views is to first delete the data corresponding to those cells/sections from your data source, and then call the appropriate deletion method on the table view. After the deletion method finishes, the table view will refer back to its data source object. If the number of cells/sections in the data source doesn’t match the number of cells/sections in the table view after the deletion is complete, your app will crash. But don’t worry—if you ever do make this mistake, the debug text that gets printed to the console is descriptive enough to point you in the right direction.
Let’s have a look at how we can delete sections from a table view. For this recipe, we will display a table view on a view controller that is displayed inside a navigation controller. Inside the table view, we will display two sections, one for odd numbers and another for even numbers. We will only display 1, 3, 5, and 7 for odd numbers and 0, 2, 4, and 6 for even numbers. For the first exercise, we are going to place a navigation bar button on our navigation bar and make that button responsible for deleting the section with odd numbers in it. Figure 4-16 shows what we want the results to look like.
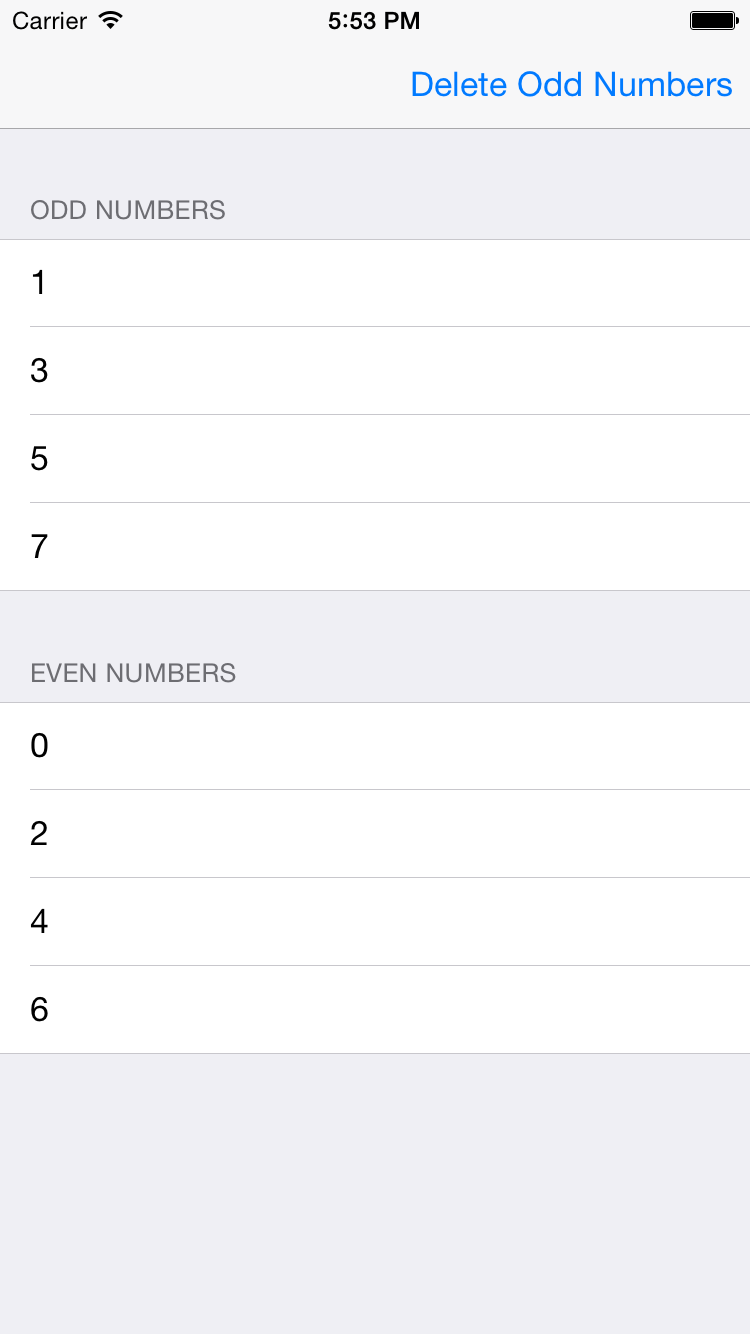
Figure 4-16. The user interface to display two sections in a table view and a button that will delete the Odd Numbers section
First things first. Let’s define our view controller:
#import <UIKit/UIKit.h>

@interface TableViewController : UIViewController <UITableViewDataSource, UITableViewDelegate>
@property (nonatomic, strong) UITableView *tableViewNumbers;
@property (nonatomic, strong) NSMutableDictionary *dictionaryOfNumbers;
@property (nonatomic, strong) UIBarButtonItem *barButtonAction;
@end
The tableViewNumbers property is our table view. The barButtonAction property is the bar button that we’ll display on the navigation bar. Last but not least, the dictionary OfNumbers property is our data source for the table view. In this dictionary, we will place two values of type NSMutableArray that contain our numbers of type NSNumber. They are mutable arrays, so that, later in this chapter, we will be able to delete them individually from the arrays in the dictionary. We will keep the keys for these arrays in our dictionary as static values in the implementation file of our view controller, so that we can later simply extract them from the dictionary using the static keys (if the keys were not static, finding our arrays in the dictionary would have to be done with string comparison, which is slightly more time-consuming than simply associating the object with a static key that doesn’t change during the lifetime of our view controller). Now let’s define the static string keys for our arrays inside the data source dictionary:
#import "TableViewController.h"

@implementation TableViewController

static NSString *SectionOddNumbers = @"Odd Numbers";
static NSString *SectionEvenNumbers = @"Even Numbers";

@end
We now need to populate our data source dictionary with values before we create our table view. Here is the simple method that will take care of populating the dictionary for us:
#pragma mark - Populating the Data Source Dictionary
- (void) constructDictionaryOfNumbers {
self.dictionaryOfNumbers = [[NSMutableDictionary alloc] init];
NSMutableArray *arrayOfEvenNumbers =
[[NSMutableArray alloc] initWithObjects:
[NSNumber numberWithUnsignedInteger:0],
[NSNumber numberWithUnsignedInteger:2],
[NSNumber numberWithUnsignedInteger:4],
[NSNumber numberWithUnsignedInteger:6],
nil];

NSMutableArray *arrayOfOddNumbers =
[[NSMutableArray alloc] initWithObjects:
[NSNumber numberWithUnsignedInteger:1],
[NSNumber numberWithUnsignedInteger:3],
[NSNumber numberWithUnsignedInteger:5],
[NSNumber numberWithUnsignedInteger:7],
nil];

[self.dictionaryOfNumbers setObject:arrayOfEvenNumbers
forKey:SectionEvenNumbers];
[self.dictionaryOfNumbers setObject:arrayOfOddNumbers
forKey:SectionOddNumbers];
}
So far so good? As you can see, we have two arrays, each of which contains some numbers (one odd and the other even numbers) and we associate them with the SectionEvenNumbers and SectionOddNumbers keys that we declared before in the implementation file of our view controller. Now let’s go ahead and instantiate our table view:
- (void)viewDidLoad {
[super viewDidLoad];

[self constructDictionaryOfNumbers];
self.barButtonAction =
[[UIBarButtonItem alloc] initWithTitle:@"Delete Odd Numbers"
style:UIBarButtonItemStylePlain
target:self action:@selector(deleteOddNumbersSection:)];
[self.navigationItem setRightBarButtonItem:self.barButtonAction animated:NO];
self.tableViewNumbers = [[UITableView alloc]
initWithFrame:self.view.frame
style:UITableViewStyleGrouped];
self.tableViewNumbers.autoresizingMask = UIViewAutoresizingFlexibleWidth | UIViewAutoresizingFlexibleHeight;
[self.view addSubview:self.tableViewNumbers];
self.tableViewNumbers.delegate = self;
self.tableViewNumbers.dataSource = self;
}
The next thing we need to do is to populate our table view with data inside our data source dictionary:
#pragma mark - Table View Data Source
- (NSInteger) numberOfSectionsInTableView:(UITableView *)tableView {
	NSInteger result = 0;
	result = [[self.dictionaryOfNumbers allKeys] count];
	return result;
}

- (NSInteger) tableView:(UITableView *)tableView
numberOfRowsInSection:(NSInteger)section {
	NSInteger result = 0;
	NSString *sectionNameInDictionary = [[self.dictionaryOfNumbers allKeys] objectAtIndex:section];
	NSArray *sectionArray = [self.dictionaryOfNumbers objectForKey: sectionNameInDictionary];
	result = [sectionArray count];
	return result;
}

- (UITableViewCell *) tableView:(UITableView *)tableView cellForRowAtIndexPath:(NSIndexPath *)indexPath {
	UITableViewCell *result = nil;
	static NSString *CellIdentifier = @"NumbersCellIdentifier";
	result = [tableView dequeueReusableCellWithIdentifier:CellIdentifier];

	if (result == nil) {
		result = [[UITableViewCell alloc] initWithStyle:UITableViewCellStyleDefault reuseIdentifier:CellIdentifier];
	}

	NSString *sectionNameInDictionary = [[self.dictionaryOfNumbers allKeys] objectAtIndex:indexPath.section];
	NSArray *sectionArray = [self.dictionaryOfNumbers objectForKey: sectionNameInDictionary];
	NSNumber *number = [sectionArray objectAtIndex:indexPath.row];
	result.textLabel.text = [NSString stringWithFormat:@"%lu", (unsigned long)[number unsignedIntegerValue]];

	return result;
}

- (NSString *) tableView:(UITableView *)tableView titleForHeaderInSection:(NSInteger)section {
	NSString *result = nil;
	result = [[self.dictionaryOfNumbers allKeys] objectAtIndex:section];
	return result;
}
Our navigation button is linked to the deleteOddNumbersSection: selector. This is a method we are going to code now. The purpose of this method, as its name implies, is to find the section that corresponds to all odd numbers in our data source and the table view, and remove that section from both of these. Here is how we will do it:
- (void) deleteOddNumbersSection:(id)paramSender {
	/* First remove the section from our data source */
	NSString *key = SectionOddNumbers;
	NSInteger indexForKey = [[self.dictionaryOfNumbers allKeys]
	indexOfObject:key];
	if (indexForKey == NSNotFound) {
		NSLog(@"Could not find the section in the data source.");
		return;
	}

	[self.dictionaryOfNumbers removeObjectForKey:key];

	/* Then delete the section from the table view */
	NSIndexSet *sectionToDelete = [NSIndexSet indexSetWithIndex:indexForKey];
	[self.tableViewNumbers deleteSections:sectionToDelete
	withRowAnimation:UITableViewRowAnimationAutomatic];

	/* Finally, remove the button from the navigation baras it is not useful any longer */
	[self.navigationItem setRightBarButtonItem:nil animated:YES];
}
Simple enough. Now, when the user presses the navigation bar button, the Odd Num- bers section will disappear from the table view. You can note that there is an animation that gets committed on the table view while the section is being deleted. This is because of the UITableViewRowAnimationAutomatic animation type that we are passing to the withRowAnimation: parameter of the deleteSections:withRowAnimation: method of our table view. Now run the app in iOS Simulator and select Debug → Toggle Slow Ani- mations. Then attempt to press the navigation bar button and see what happens. You can see the deletion animation in slow motion. It’s neat, isn’t it? After the deletion is completed, our app will look similar to Figure 4-17.
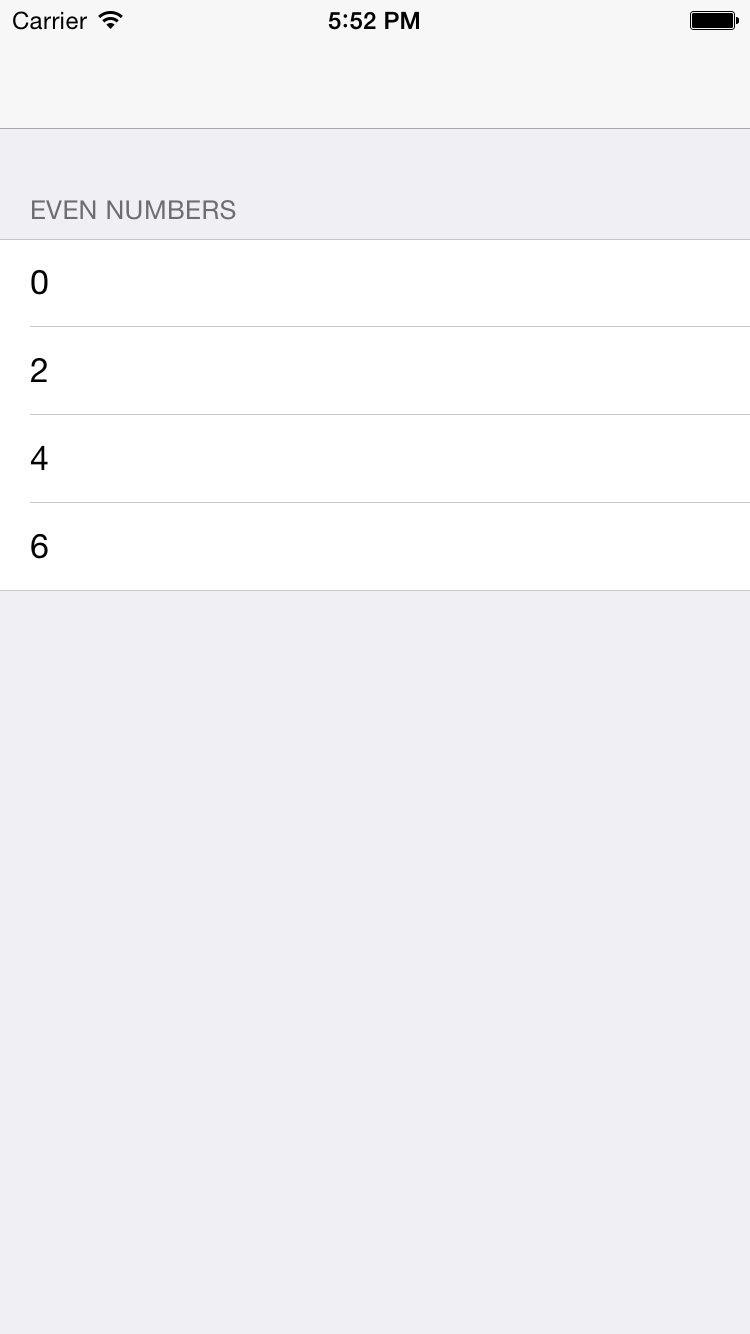
Figure 4-17. The section containing odd numbers is removed from the table view
We now know how to delete sections from table views. Let’s move to deleting cells. We are going to change the functionality of our navigation bar button so that when it is pressed, it will delete all cells in all sections of our table view with a numerical value greater than 2. That includes all odd and even numbers greater than 2. So let’s change our navigation bar button item in the viewDidLoad method of our view controller:
- (void)viewDidLoad {
	[super viewDidLoad];

	[self constructDictionaryOfNumbers];
	self.barButtonAction =
	[[UIBarButtonItem alloc] initWithTitle:@"Delete Numbers > 2" style:UIBarButtonItemStylePlain target:self action:@selector(deleteNumbersGreaterThan2:)];
	[self.navigationItem setRightBarButtonItem:self.barButtonAction animated:NO];
	self.tableViewNumbers = [[UITableView alloc] initWithFrame:self.view.frame style:UITableViewStyleGrouped];
	self.tableViewNumbers.autoresizingMask = UIViewAutoresizingFlexibleWidth |UIViewAutoresizingFlexibleHeight;
	self.tableViewNumbers.delegate = self;
	self.tableViewNumbers.dataSource = self;
	[self.view addSubview:self.tableViewNumbers];
}
Figure 4-18 shows the results of our app running in iPhone Simulator.

Figure 4-18. A button that will delete all cells containing a number greater than 2
The navigation bar button is now connected to the deleteNumbersGreaterThan2: selec- tor. This is a method that we have to implement in our view controller, but before jumping into coding it straightaway, let’s first define what this method should do:
- Find both arrays of odd and even numbers in our data source and grab the index paths (of type NSIndexPath) of those numbers that are greater than 2. We will use these index paths to later delete the corresponding cells from the table view.
- Delete all the numbers greater than 2 from our data source, in both the even and odd number dictionaries.
- Delete the relevant cells from the table view. We collected the index paths of these cells in the first step.
- Remove the navigation bar button, since it won’t be of any use after the relevant cells have been deleted from the data source and the table view. Alternatively, if you want, you could just disable this button—but I think removing that button provides a better user experience, since a disabled button is really of no use to the user.
- (void) deleteNumbersGreaterThan2:(id)paramSender {
	NSMutableArray *arrayOfIndexPathsToDelete = [[NSMutableArray alloc] init];
	NSMutableArray *arrayOfNumberObjectsToDelete = [[NSMutableArray alloc] init];

	/* Step 1: gather the objects we have to delete from our data source and their index paths */
	__block NSUInteger keyIndex = 0;
	[self.dictionaryOfNumbers enumerateKeysAndObjectsUsingBlock:
	^(NSString *key, NSMutableArray *object, BOOL *stop) {
		[object enumerateObjectsUsingBlock:
		^(NSNumber *number, NSUInteger numberIndex, BOOL *stop) {
			if ([number unsignedIntegerValue] > 2) {
				NSIndexPath *indexPath = [NSIndexPath indexPathForRow:numberIndex inSection:keyIndex];
				[arrayOfIndexPathsToDelete addObject:indexPath];
				[arrayOfNumberObjectsToDelete addObject:number];
			}
		}];
		keyIndex++;
	}];

	/* Step 2: delete the objects from the data source */
	if ([arrayOfNumberObjectsToDelete count] > 0) {
		NSMutableArray *arrayOfOddNumbers = [self.dictionaryOfNumbers objectForKey:SectionOddNumbers];
		NSMutableArray *arrayOfEvenNumbers = [self.dictionaryOfNumbers objectForKey:SectionEvenNumbers];
		[arrayOfNumberObjectsToDelete enumerateObjectsUsingBlock:
		^(NSNumber *numberToDelete, NSUInteger idx, BOOL *stop) {
			if ([arrayOfOddNumbers indexOfObject:numberToDelete] != NSNotFound) {
				[arrayOfOddNumbers removeObject:numberToDelete];
			}

			if ([arrayOfEvenNumbers indexOfObject:numberToDelete]
			!= NSNotFound) {
				[arrayOfEvenNumbers removeObject:numberToDelete];
			}

			[arrayOfEvenNumbers removeObject:numberToDelete];
		}];
	}
	/* Step 3: delete the cells that correspond to the objects */
	NSArray *arrayOfPaths = [[NSArray alloc] initWithArray:arrayOfIndexPathsToDelete];
	[self.tableViewNumbers deleteRowsAtIndexPaths:arrayOfPaths withRowAnimation:UITableViewRowAnimationAutomatic];
	[self.navigationItem setRightBarButtonItem:nil animated:YES];
}
After the user presses the button on the navigation bar, all cells containing a number greater than 2 will be deleted from our data source, and the table view and our app will look like Figure 4-19.
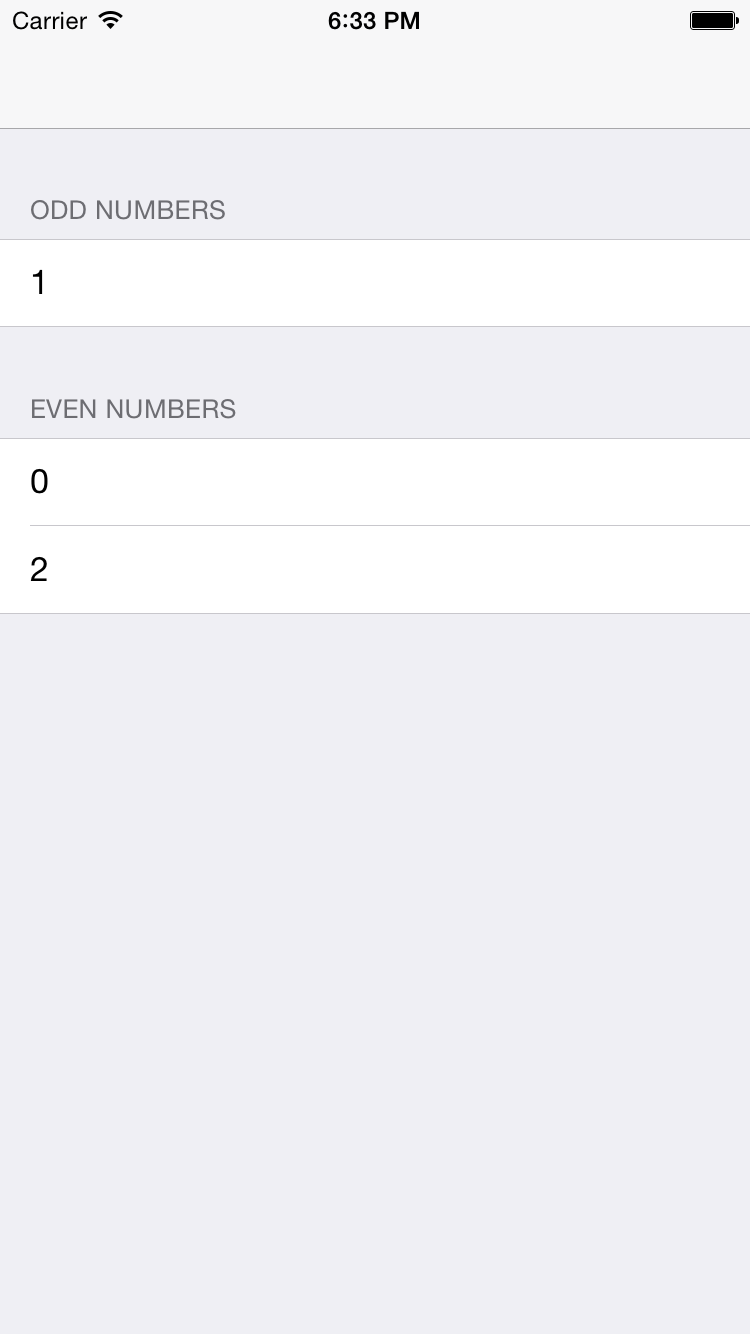
Figure 4-19. We have deleted all cells with a value greater than 2